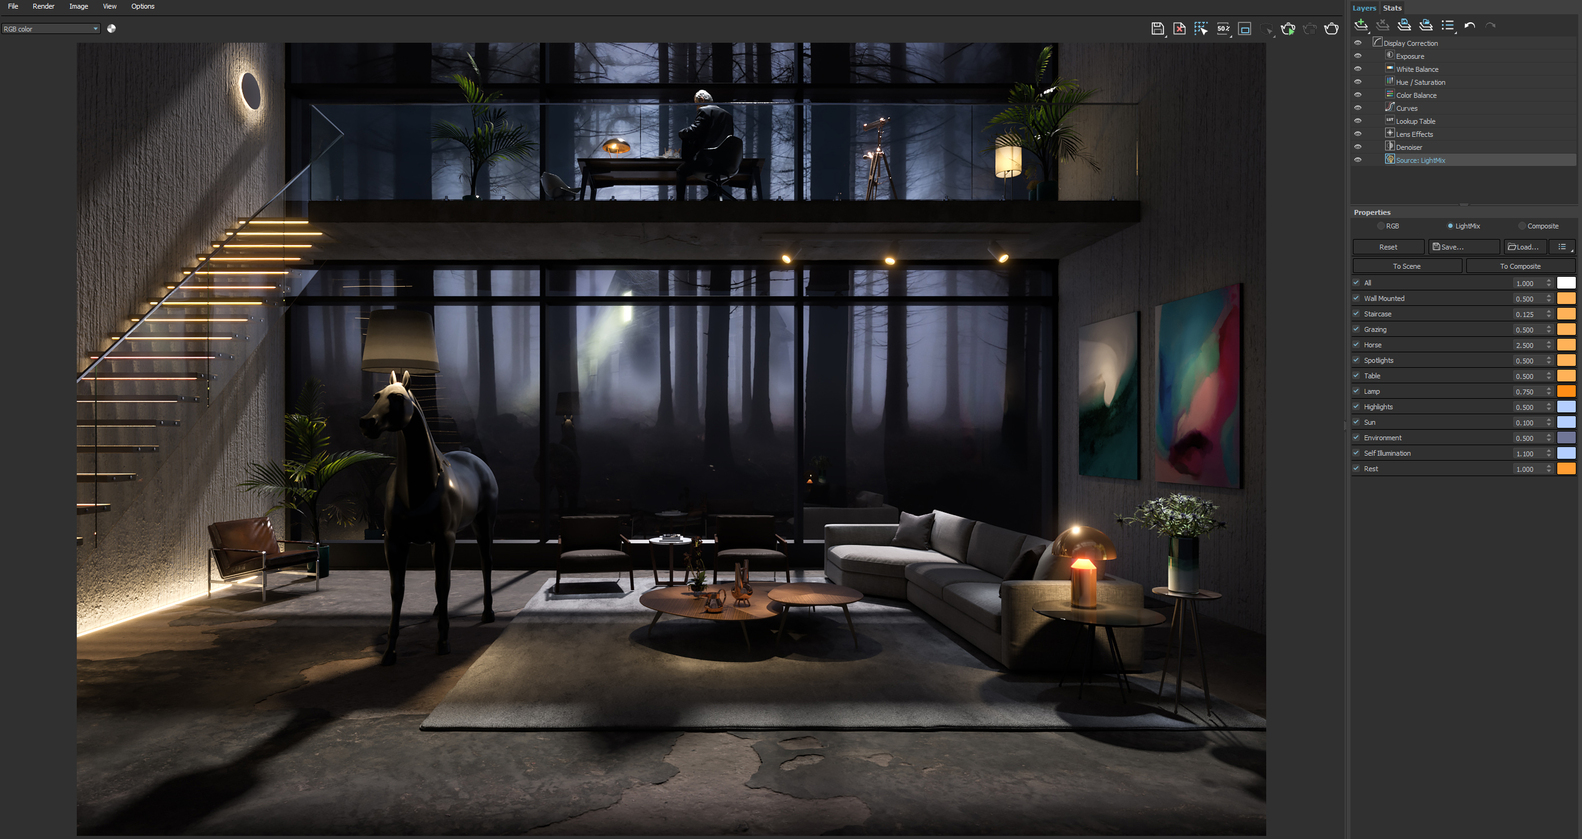
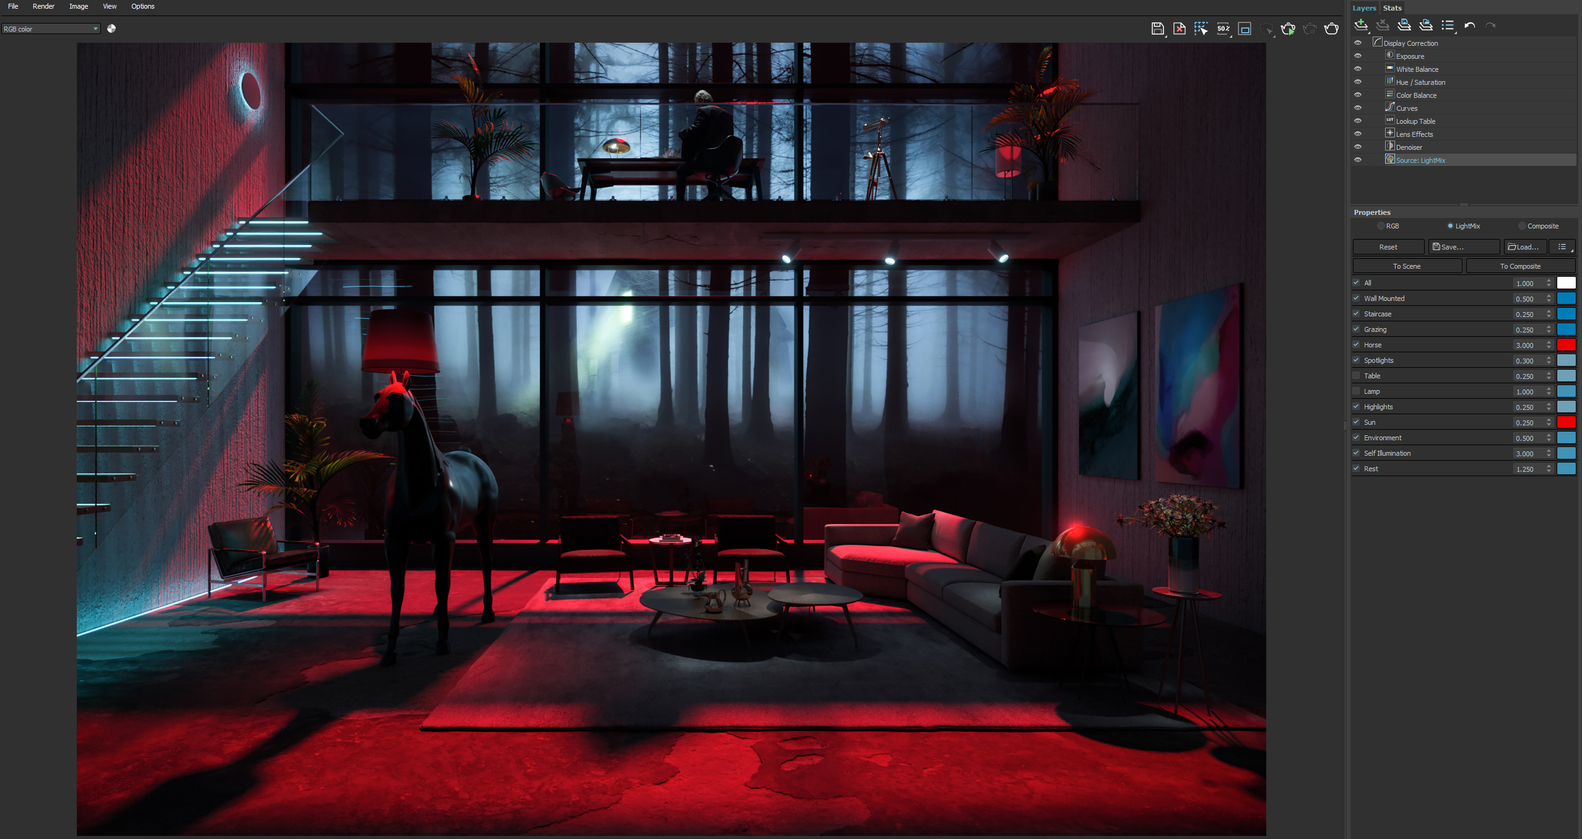
Using the new Light Mix in V-Ray 5, artists and designers can visualize ideas even faster and more effectively. Now, from just one single render, you have the power to create as many images as you can imagine, at a speed that simply wasn’t possible with earlier versions.
My name is Nikos Nikolopoulos and I’m the founder of Creative Lighting. We know that lighting can bring an emotional value to architecture, and now, with the new Light Mix, V-Ray 5 has been designed to provide the creative freedom we need to “paint” our designs with light and color.
I’m passionate about light and, after spending many years studying and analyzing cinematic lighting techniques, I’ve developed an inspirational approach to lighting in CGI for architects, designers, and visualizers. The scene showcased is one of my original concepts: The Writer’s House. This open, light-filled space has been designed to capture the imagination of the occupant — and you, the viewer. Set in the middle of a woodland or forest, the setting allows us to play with the atmospheric fog outdoors as well as the natural and artificial lighting in our scene.
In my opinion, Light Mix is ideal for architectural visualization and allows you to make lighting decisions quickly and efficiently. Light Mix will save you time in production and allow you to be more creative as an artist. It is not just about changing intensity and color; it is about bringing your creative ideas to life. So let’s take a look at how we can quickly and easily achieve multiple lighting looks from one single render in V-Ray 5 for 3ds Max.
What is Light Mix and How Does it Work?
Light Mix is a powerful tool that allows you to easily adjust the color and intensity of your lights both during and — more importantly — after rendering. Additionally, you have the option to turn your lights on and off as well as control or change the mood of your scene, all from one single render.
As a real-world comparison, Light Mix is a bit like switching all the bulbs in your home to smart bulbs and controlling everything from your phone. But in the case of V-Ray 5, you’re able to change all your lights using simple switches — even after you’ve rendered.
To activate Light Mix, just add the VRayLightMix Render Element and select how you would like your lights grouped: individual, instanced, groups, layers or manual light selects. The default option is “Instanced Lights,” which means if there are instanced lights in the scene, each group has its separate channel. All unique lights in the scene are stored in their individual channels.
The other available group options include:
Individual Lights: Every light you add to the scene creates a separate channel.
Grouped Lights: Add lights to a group and you will get separate channels per group; lights that are not grouped in the scene are stored in their individual render channels.
Layers: Add lights on a layer and you will get separate channels per layer.
Manual Light Selects: This option is not automated so you need to add your lights manually in the V-Ray Light Select element. Every new Light Select element will create a separate channel. Lights that are not specified in any element are automatically added in a single channel called “Rest.”
Keep in mind that each grouping mode automatically creates an Environment channel for your environment and a Self Illumination channel for your light-emitting materials.
Let’s take a look at Light Mix in action. From just a single render, and by changing the intensity and color in our lights, we can quickly and efficiently create multiple moods:
How to Use Light Mix in V-Ray 5
1. Name your lights
To get the correct names in your channels, you always need to name your lights when using Light Mix. This workflow will allow you to know which lights are affected by each channel and will save you time in production when you have lots of channels.
2. Choose the right intensity for your lights
It’s important to have the correct intensity for your lights. Make sure your lights in the scene are not too bright or too dark and then use Light Mix to adjust the intensity based on the mood that you want to create.
3. Keep your lights white
To take full advantage of the power of Light Mix, it’s best to keep your lights white in the scene and change the color through Light Mix to create your own inspiring color palettes.
4. Save your Light Mix
Create different lighting moods and color palettes and save them individually so you can load them back at any time.
Note: Big changes in the Light Mix might introduce noise; if you notice noise or artifacts from high values in the Light Mix, press the “To Scene” button — this will set all changes to intensities/colors back to the scene lights. A re-render is needed for those changes to be embedded.
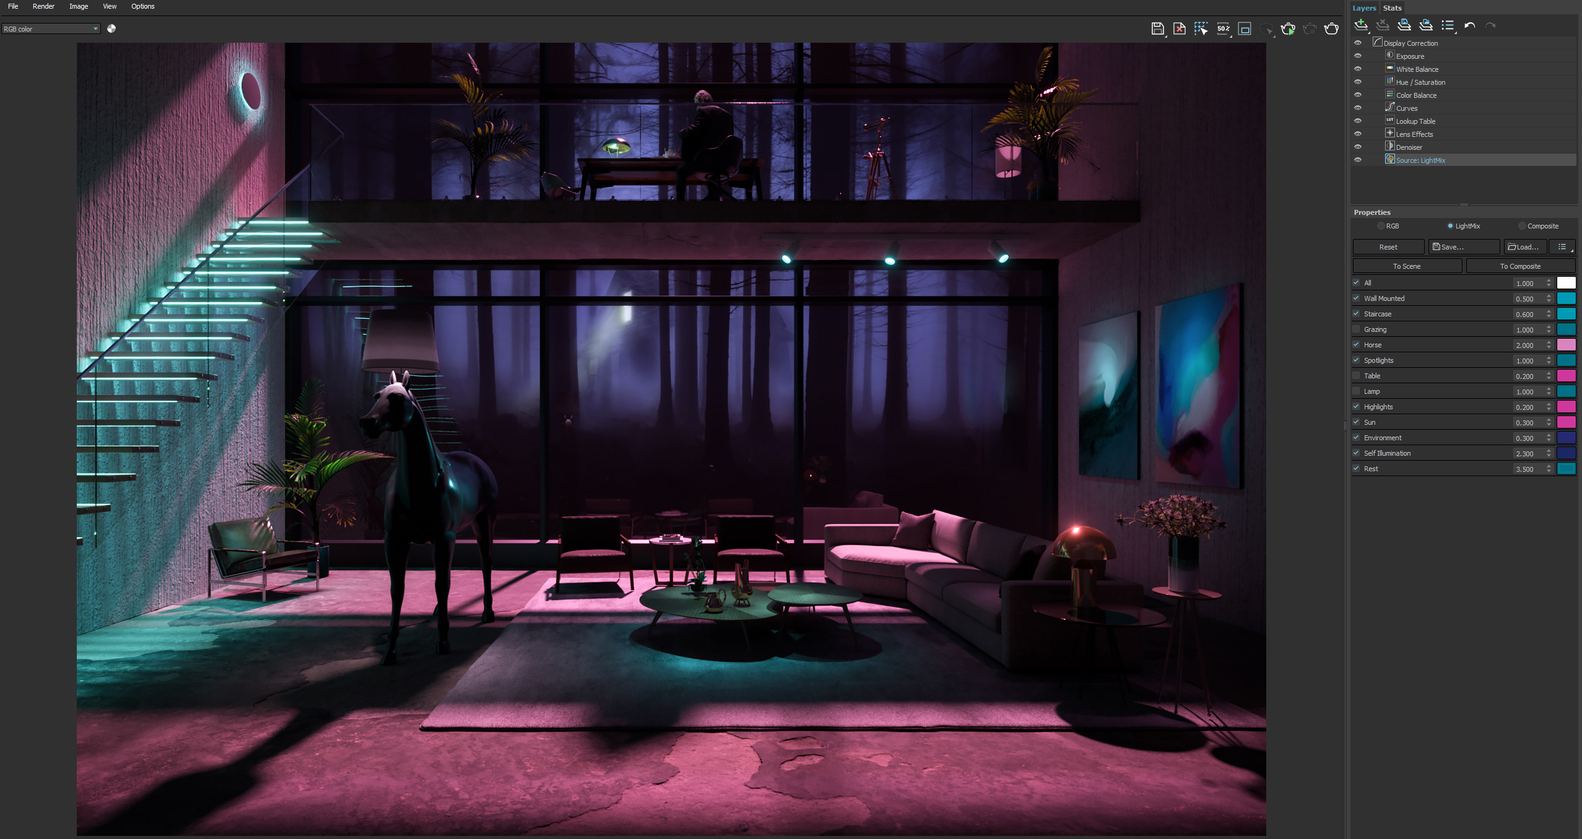
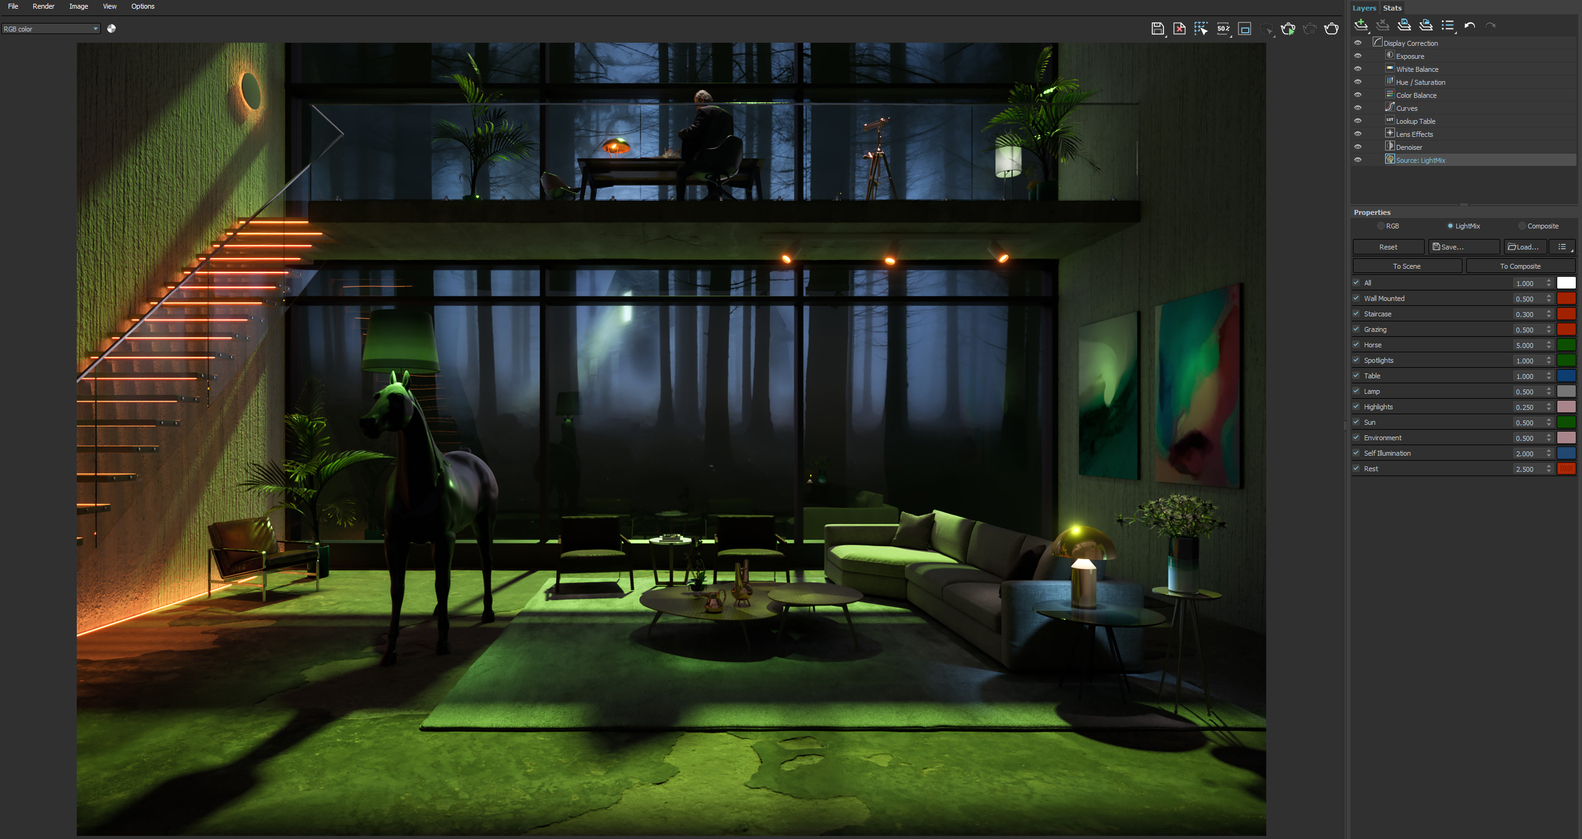
And now, from the original render, let’s continue our creative journey with Light Mix. This time, we’ll look to the world of cinema to create some more unique color palettes:
Save this picture!
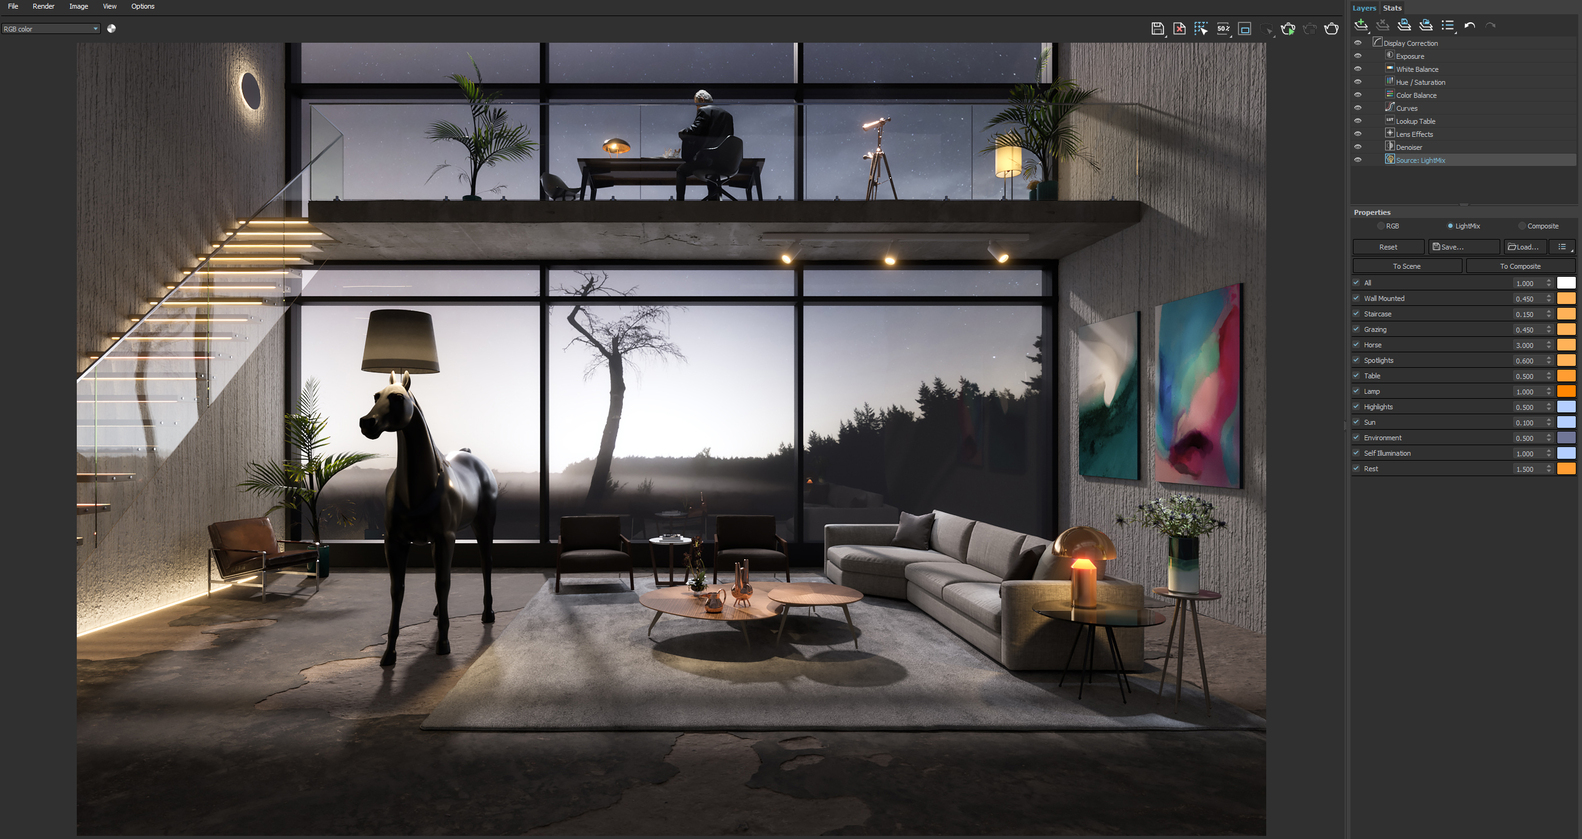
I think that V-Ray 5 will allow artists to unleash their full creative potential simply by discovering the secrets and properties of Light Mix. In this final image, I’ve switched the outdoor environment from an enclosed forest space to an open, more deserted setting, allowing for even more possibilities.
V-Ray 5 for 3ds Max was released on June 16 and a free 30-day trial is available to download here.
READ ALSO: Lighting awards | Συνεντευξη με τον πρόεδρο του ΣΑΔΑΣ
